Advantages and Disadvantages of Flexible Solar Panels: What You Should Know Before Buying
Published: 20 Oct 2025
Flexible solar panels are thin and bendable sheets that can turn sunlight into electricity. They are not like the heavy glass panels we often see on rooftops. These panels can fit on curved or uneven surfaces, making them useful for many places. But like any technology, they have pros and cons. Knowing both advantages and disadvantages of flexible solar panels helps you decide if they are right for your home, RV, or business. In this article, you will learn how these panels work, where they shine, and what limits they have before you choose them for your solar setup.
Types of Flexible Solar Panels
Flexible solar panels come in a few main types, each made with different materials and suited for specific uses. Knowing these types helps you choose the right one for your home, RV, or outdoor setup. Here are the most common types explained in simple words:
- Amorphous Silicon (a-Si) Panels
- Copper Indium Gallium Selenide (CIGS) Panels
- Organic Photovoltaic (OPV) Panels
- Thin-Film Solar Panels
Here, I will explain all types of flexible solar panels below.
1. Amorphous Silicon (a-Si) Panels
These panels use a thin layer of silicon placed on plastic or metal sheets. They are lightweight and easy to bend. Amorphous panels work well in low light but produce less power than other types. They are great for small devices and portable use.
Best for: Camping, small gadgets, and areas with mixed sunlight.
2. Copper Indium Gallium Selenide (CIGS) Panels
CIGS panels are made with a mix of copper, indium, gallium, and selenium. They are very flexible and have better efficiency than amorphous silicon panels. Their thin design makes them perfect for curved surfaces like RV roofs or boats.
Best for: Vehicles, curved roofs, and portable solar systems.
3. Organic Photovoltaic (OPV) Panels
These panels use carbon-based materials instead of traditional silicon. They are super light and eco-friendly. However, their lifespan and efficiency are lower than other types. OPV panels are still improving with new technology.
Best for: Light power needs and experimental or educational projects.
4. Thin-Film Solar Panels
Thin-film panels are made by spreading solar material on a thin base, such as plastic or metal. They can be rolled, bent, or shaped easily. While they are cheaper and lighter, they produce less energy per square foot.
Best for: Temporary setups, mobile homes, and outdoor gear. Each type of flexible solar panel offers something different — some focus on strength, others on weight or price. The right choice depends on how and where you plan to use solar energy.
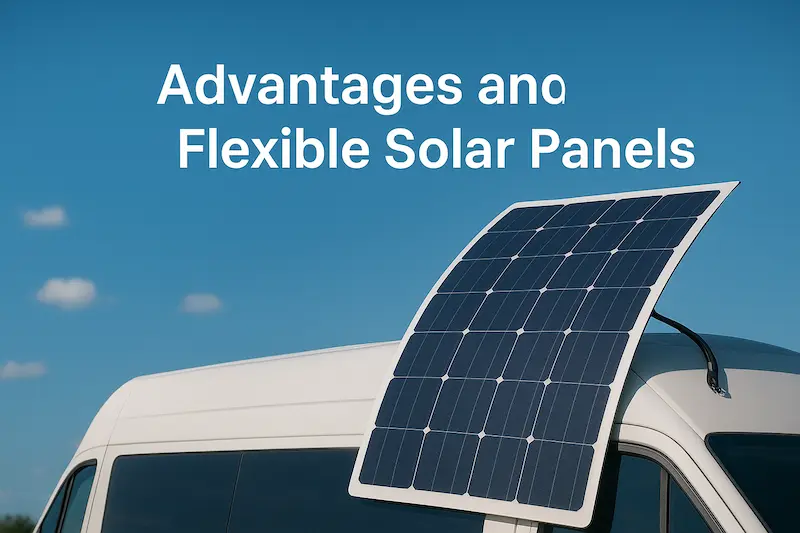
Advantages of Flexible Solar Panels
Flexible solar panels offer many benefits that make them a smart choice for people who want clean and easy solar power. They are light, simple to install, and work well in places where traditional panels cannot fit. These panels are perfect for mobile setups, curved roofs, and outdoor uses like boats or camping gear. They help users save energy while keeping things simple and efficient.
Here are the main benefits of flexible solar panels:
- Lightweight Design.
- Flexible Shape.
- Easy Installation.
- Portable.
- Durable Build.
- Energy Efficient.
- Low Maintenance.
- Modern Look.
Here we will explain in simple words all the benefits of flexible solar panels in detail.
1. Lightweight Design
Flexible solar panels are very light compared to regular glass panels. This makes them easy to carry and move from one place to another. You can install them without needing strong roof support or special tools. Their low weight also reduces pressure on surfaces like RV roofs or tents.
Key benefits:
- Simple to lift and handle.
- Easy to mount on weak or light surfaces.
- Reduces overall setup cost.
2. Flexible Shape
These panels can bend slightly, allowing them to fit curved or uneven areas. You can place them on round roofs, vehicles, or even backpacks. This flexibility gives more freedom to use solar energy in creative ways. They work well in places where flat panels cannot fit.
Key benefits:
- Works on curved or uneven surfaces.
- Offers more installation options.
- Perfect for outdoor and mobile use.
3. Easy Installation
Installing flexible solar panels is quick and simple. They often come with adhesive backs or simple clips. No need for heavy frames or drilling. Even people without technical skills can set them up easily.
Key benefits:
- Saves time during setup.
- No need for special tools.
- It can be done by anyone with basic guidance.
4. Portable Use
These panels are great for travel and outdoor activities. You can use them on RVs, boats, or during camping trips. Their lightweight and slim shape makes them easy to pack and move. They provide power anywhere the sun shines.
Key benefits:
- Ideal for mobile energy needs.
- Perfect for travelers and campers.
- Provides power in remote areas.
5. Durable Build
Flexible solar panels are made with strong materials that handle bumps and shocks. They don’t crack like glass panels. Their flexible design helps them last longer, even in rough conditions. This makes them reliable for outdoor and moving setups.
Key benefits:
- Withstands shocks and vibrations.
- Lasts longer in outdoor use.
- Safe to transport and store.
6. Energy Efficient
Even though they are thin, these panels can still turn sunlight into useful power. They work well in both bright and cloudy weather. You can count on them for steady energy output. This makes them suitable for places with changing sunlight.
Key benefits:
- Works in low-light conditions.
- Provides a steady power supply.
- Reduces dependence on grid energy.
7. Low Maintenance
Flexible solar panels need very little care. They don’t have frames or glass parts that get dirty easily. A quick wipe with a soft cloth is often enough. This saves time and effort for users.
Key benefits:
- Easy to clean and manage.
- Saves time and cost on upkeep.
- Keeps performance steady for long periods.
8. Modern Look
These panels have a clean, sleek design that looks good on any surface. Their thin structure makes them blend easily with roofs and vehicles. They give a modern touch while providing green energy. Many users like them for their stylish and simple look.
Key benefits:
- Adds a neat appearance to surfaces.
- Looks better than bulky glass panels.
- Combines design with energy use.
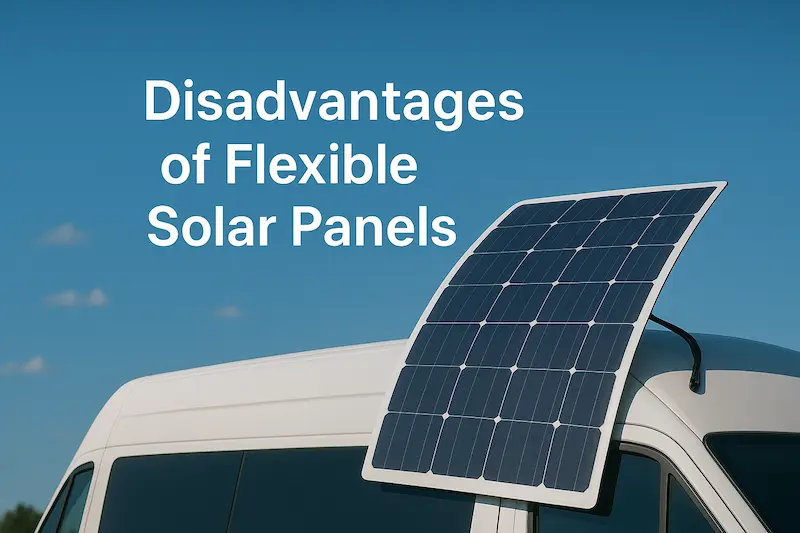
Disadvantages of Flexible Solar Panels
While flexible solar panels have many good features, they also come with some drawbacks. These panels are usually less powerful than traditional glass panels. They may wear out faster and can get damaged by extreme heat. Their higher cost for lower output can also be a concern for some users. It’s important to understand these limits before choosing them for long-term energy use.
Here are the main drawbacks of flexible solar panels:
- Lower Efficiency.
- Shorter Lifespan.
- Heat Sensitivity.
- Higher Cost per Watt.
- Limited Mounting Options.
- Difficult to Repair.
- Less Suitable for Large Systems.
- Possible Deformation.
Here, I will explain all the drawbacks of flexible solar panels in detail.
1. Lower Efficiency
Flexible solar panels produce less power than standard glass panels. Their thin cells cannot absorb as much sunlight. This means you may need more panels to get the same energy. They work well for small uses but are not the best for high-power needs.
Main concerns:
- Produces less energy per panel.
- Needs more panels to meet power needs.
- Not ideal for big solar setups.
2. Shorter Lifespan
Because they are made with thin materials, flexible panels do not last as long. Over time, their layers may wear out or peel off. The energy output also drops faster than traditional panels. This makes them better for short-term or light use.
Main concerns:
- Wears out quicker than glass panels.
- Output drops faster with age.
- May need replacement sooner.
3. Heat Sensitivity
Flexible solar panels can get too hot in strong sunlight. When this happens, their performance goes down. High heat can also cause the materials to weaken or warp. This makes them less efficient in hot regions.
Main concerns:
- Power drops in extreme heat.
- Can bend or lose shape.
- Less durable in sunny climates.
4. Higher Cost per Watt
Although they are small and easy to install, they cost more per unit of power. You spend more money to produce the same energy as regular panels. This makes them less budget-friendly for large systems. The cost balance may not suit everyone.
Main concerns:
- Expensive for low output.
- Not cost-effective for big setups.
- May increase total project cost.
5. Limited Mounting Options
Flexible panels often use glue or tape for mounting. These materials can weaken over time. Strong winds, rain, or sun may cause them to come loose. This limits where you can place them safely.
Main concerns:
- Mounting can wear out with time.
- Adhesive may fail in harsh weather.
- Fewer secure installation choices.
6. Difficult to Repair
If a flexible panel gets damaged, fixing it is hard. The thin layers and bendable parts make repairs tricky. In most cases, users need to replace the whole panel. This can be costly and inconvenient.
Main concerns:
- Hard to fix damaged parts.
- Repairs may not last long.
- Replacements can increase costs.
7. Less Suitable for Large Systems
These panels work best for small power setups. They cannot produce enough energy for big homes or factories. To cover large needs, you would need too many panels. This makes them impractical for large-scale use.
Main concerns:
- Not fit for full-house installations.
- Needs a large surface area.
- Poor choice for industrial projects.
8. Possible Deformation
Flexible panels can lose their shape if bent too often. Over time, cracks or folds may form in the surface. This reduces their ability to catch sunlight properly. It also shortens their working life.
Main concerns:
- Shape changes with frequent bending.
- Reduces sunlight capture.
- Can damage internal layers.
Quick Facts.
- They bend, not break! These panels can curve around roofs, tents, and even backpacks.
- Super light to carry. You can lift one with one hand.
- Perfect for travelers. Campers, van owners, and boat users love them for easy power on the go.
- No drilling needed. Most flexible panels stick right onto a surface, simple and clean.
- They work quietly. No noise, no fuel, just pure sunlight turned into power.
- Eco-friendly choice. They help reduce carbon use while keeping your setup neat and modern.
Helpful Tips.
- Know your power needs. Before buying, check how much energy your devices use so you can pick the right panel size.
- Check the surface first. Make sure the area where you’ll place the panel is clean and smooth for a better grip.
- Avoid sharp bends. These panels can flex, but folding them too much can cause cracks.
- Keep them cool. Try to place them where there’s airflow — too much heat can lower their power output.
- Clean gently. Use a soft cloth and mild soap to remove dust without scratching the surface.
- Store safely. When not in use, roll them loosely and keep them in a dry spot to make them last longer.
Step-by-Step Guide on How to Install a Flexible Solar Panel
Tools & materials you need first
- Flexible solar panel(s)
- Charge controller (matches panel and battery)
- Battery (deep cycle) or battery bank
- Inverter (if you need AC power)
- Fuse or circuit breaker (appropriate amp rating)
- Mounting tape or marine-grade adhesive, or rivets/clamps
- Wires and connectors (check panel’s connector type)
- Multimeter for testing
- A cleaning cloth and mild soap
- Screwdriver, scissors, wire stripper, crimp tool
Installation steps
- Plan your system
- Decide what devices you will run.
- Calculate the power you need.
- Choose panel size and battery capacity.
- Pick the best spot
- Choose a sun-facing area with little shade.
- Select a flat or gently curved surface.
- Make sure you can reach the area for cleaning.
- Measure the surface
- Measure length and width where the panel will sit.
- Confirm the panel fits without hanging over the edges.
- Leave space for wiring and airflow.
- Inspect the surface
- Check for dirt, rust, or loose parts.
- Repair rough or weak spots first.
- Ensure the surface can hold the panel safely.
- Clean the surface
- Wipe the area with a soft cloth and mild soap.
- Rinse and let it dry completely.
- A clean surface helps the adhesive stick well.
- Test the panel
- Use a multimeter to check open-circuit voltage.
- Confirm the panel gives voltage in sunlight.
- This step verifies the panel works before installation.
- Lay out the panel
- Place the panel where it will sit.
- Check the cable length to the charge controller.
- Adjust position for best sun exposure.
- Mount the panel (adhesive method)
- Peel the backing and press the adhesive side down.
- Press firmly along the panel for full contact.
- Let the adhesive cure as the maker recommends.
Or mount with clamps/rivets:
- Mark drill or clamp points.
- Fasten clamps or rivets without over-tightening.
- Leave a small gap for expansion and airflow.
- Route the cables
- Run the wires from the panel to the charge controller.
- Use clips or ties to keep wires neat and safe.
- Avoid sharp edges and moving parts.
- Install a fuse or breaker
- Place a fuse or breaker near the battery’s positive terminal.
- Use the correct amp rating for your panel array.
- This protects the system from short circuits.
- Connect to the charge controller
- Attach the panel’s positive and negative to the controller inputs.
- Then connect the controller outputs to the battery.
- Follow the controller’s wiring order and labels.
- Connect the battery
- Connect the positive and negative to the battery terminals.
- Secure the battery in a ventilated place.
- Check polarity twice before final connection.
- Add the inverter (if needed)
- Connect the inverter to the battery terminals.
- Place the inverter away from heat and water.
- Turn it on after the battery shows a charge.
- Test the whole system
- Turn on the charge controller and inverter.
- Use the multimeter to check voltages at the battery and controller.
- Try powering a small device to confirm output.
- Secure and weatherproof
- Seal cable entry points with silicone or gaskets.
- Use UV-resistant tape on exposed wires.
- Check seals after heavy weather.
- Monitor and maintain
- Clean the panel every few months.
- Check wiring and mounts for wear.
- Replace parts if you see damage or loss of output.
Safety tips (short and clear)
- Always disconnect the battery before major wiring changes.
- Use the right fuse size to avoid fires.
- Wear gloves and eye protection when cutting or crimping wire.
- If unsure, hire a licensed electrician to finish wiring.
These steps give a clear path to install flexible solar panels safely. Follow each step slowly. Check connections and voltages. This keeps your system safe and working well.
Conclusion
Flexible solar panels bring both comfort and limits. We learned how they are light, easy to install, and perfect for travel or curved spaces. But we also saw their weak points — like lower power output and shorter life. Knowing both sides helps you make a smart choice that fits your needs. Every setup is different, so balance your goals with what these panels offer. Think smart before choosing, and pick the solar option that works best for you. For better performance insights, see how TopCon cell technology improves solar efficiency and compare it with polycrystalline solar panels to find what suits your setup.
FAQs About Pros and Cons of Flexible Solar Panels
Here are frequently asked questions about flexible solar panels
Not really. Flexible panels usually produce less power because they are thinner. They work well for small setups like RVs or boats, but not for big homes. If you need more energy, you’ll need more panels or a mix with regular ones.
Most flexible panels last around 5 to 10 years. Their thin design makes them wear out faster than glass panels. With good care and safe storage, they can last longer. Keeping them clean and cool helps maintain their power
Yes, that’s one of their best features! They can fit on curved roofs, vehicles, and tents easily. Just make sure the surface is clean and smooth before installing. Avoid bending them too much to prevent damage.
It depends on how you plan to use them. They cost more per watt, but their light weight and easy setup make them great for mobile use. For travel or temporary setups, they are a smart choice. For big systems, traditional panels may be better.
No, they are quite easy to care for. Just clean them gently with a soft cloth to remove dust. Check the cables and adhesive once in a while. Simple care helps keep them running well for years.

- Be Respectful
- Stay Relevant
- Stay Positive
- True Feedback
- Encourage Discussion
- Avoid Spamming
- No Fake News
- Don't Copy-Paste
- No Personal Attacks
- Be Respectful
- Stay Relevant
- Stay Positive
- True Feedback
- Encourage Discussion
- Avoid Spamming
- No Fake News
- Don't Copy-Paste
- No Personal Attacks
